MotionEye on Debian 10

Requirements

  • a machine running a recent Linux distro
  • python 2.7
  • tornado 3.1+
  • jinja2
  • PIL or pillow
  • curl, libcurl & pycurl
  • motion (optional)
  • ffmpeg (optional)
  • v4l-utils (optional)

The Motion Daemon

The motion daemon itself is optional, but needed in most cases. Install it (along with ffmpeg and v4l-utils) unless you configure a machine that will only act as a hub for other motionEye-based cameras.

Install Instructions

motionEye releases are uploaded to PyPI, so you can use the pip (or pip2) command to install it as well as (some of) its dependencies. Following are detailed instructions for some common distributions.

note 1: The given commands normally need to be run as root; type them in a root shell or use sudo before each command.

note 2: On systems where Python3 is the default Python interpreter, you should use the pip2command instead of pip.

note 3: If you are configuring a motionEye system that will only act as a hub for other motionEye-based cameras (i.e. no locally connected cameras and no IP cameras), you can skip installing motionffmpeg and v4l-utils.

note 4 : All commands require root; use sudo before each command or become root using su.

Installation:

  1. Install motionffmpeg and v4l-utils:
    • apt-get install motion ffmpeg v4l-utils
  2. Install the dependencies from the repositories:
    • apt-get install python-pip python-dev python-setuptools curl libssl-dev libcurl4-openssl-dev libjpeg-dev libz-de

      note: Python 2.7 is required. If your system still runs Python 2.6 or older, please upgrade.
  3. Install motioneye, which will automatically pull Python dependencies (tornadojinja2pillow and pycurl):
    • pip install motioneye

      note: If pillow installation fails, you can try installing it from official repos using apt-get install python-pillow.
  4. Prepare the configuration directory:
    • mkdir -p /etc/motioneye
    • cp /usr/local/share/motioneye/extra/motioneye.conf.sample /etc/motioneye/motioneye.conf
  5. Prepare the media directory:
    • mkdir -p /var/lib/motioneye
  6. Add an init script, configure it to run at startup and start the motionEye server:
    • cp /usr/local/share/motioneye/extra/motioneye.systemd-unit-local /etc/systemd/system/motioneye.service
    • systemctl daemon-reload
    • systemctl enable motioneye
    • systemctl start motioned
  7. To upgrade to the newest version of motioneye, after it has been released, just issue:
    • pip install motioneye –upgrade

      note that will update all the other required dependecies
    • systemctl restart motioneye

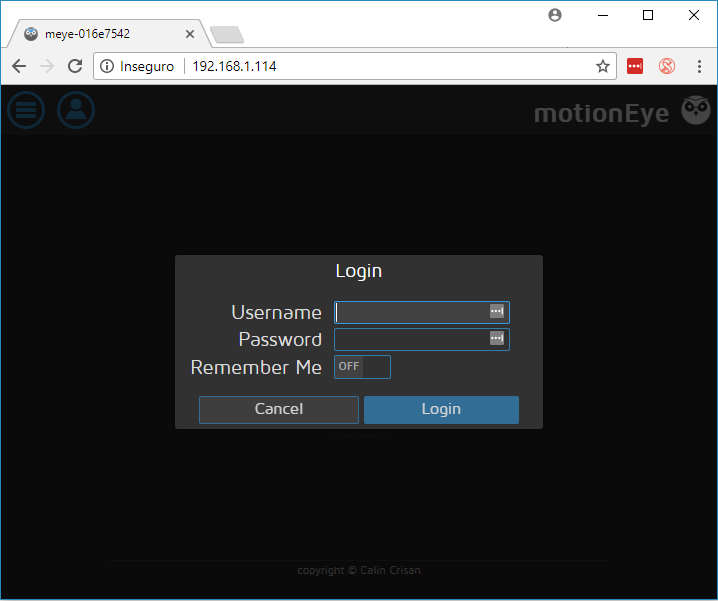
Accessing The Frontend

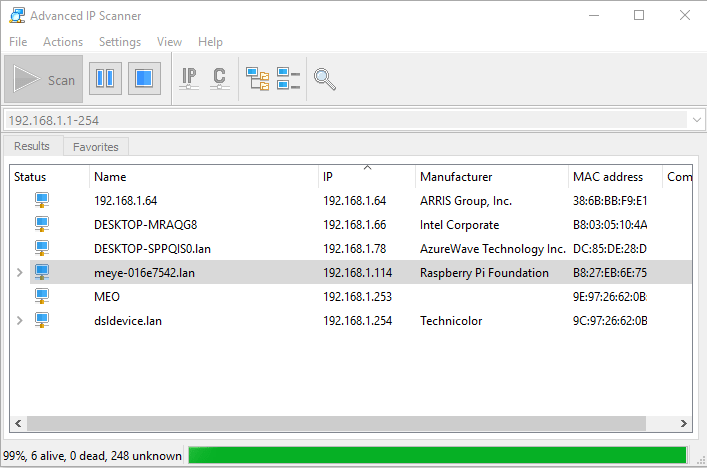
After having successfully followed the installation instructions, the motionEye server should be running on your system and listening on port 8765. Fire up your favorite web browser and visit the following URL (replacing [your_ip] with… well, your system’s IP address):

http://[your_ip]:8765/

Use admin with empty password when prompted for credentials.

Upgrading

Upgrading should be as easy as running the following command (as root):

  • pip install –upgrade motioneye

Enable network storage

Change the smb_shares in the motioneye.conf file from false to true

  • nano /etc/motioneye/motioneye.conf

Add Push Notifications to MotionEyeOS

MotionEyeOS is perfect for using your Pi as a CCTV camera. Want to detect movements while you’re out? Then read on…

One benefit of MotionEyeOS is its ability to detect motion and capture images and movies of what triggered it. You can also access a live stream of your camera online, even when you’re not home, which is handy if you want to check in every now and then. When away from home, being notified of any movement is very useful, and MotionEyeOS has a nifty option for custom notifications.

The full article can be found in The MagPi 43 and was written by Wesley Archer

This guide will assume you have already set up and configured MotionEyeOS. A Pushover licence is required, which costs £3.99/$4.99. For help, check out the MotionEyeOS wiki.

You’ll need

MotionEyeOS

Raspberry Pi

Pushover app for iOS or Android with full licence (£3.99/$4.99)

STEP-01 Create an application in Pushover

Pushover has a great, easy to use API. Before we start, we need to register an application with it. Click on Register Application under the Your Applications heading on the Pushover website (pushover.net). Give your app a name – something like RaspiMotion – and then make sure the type is Application. Give your app a quick description (e.g. ‘Push notifications sent by my Raspberry Pi’) and, if feeling creative, upload a custom icon which will show in your Pushover client app whenever a notification is sent.

STEP-02 Get your API token and user key

Once you have created your application, you should have access to an API token/key. This is a unique combination of numbers and letters – please keep this a secret! You’ll also need your user key, which is shown once you log into Pushover’s website. Okay, so you have an app and your API and user keys. You’ll now need to download (or recreate if you so wish) a simple Python script to tell your Raspberry Pi to work its magic once the script is called upon by MotionEyeOS.

STEP-03 Create your Python script

MotionEyeOS is not like Raspbian. You cannot use certain commands as you would normally, such as git clone, so we’ll have to create our Python script manually; you can also drag and drop using WinSCP if preferred. We also don’t need to use sudo, as we’re already logged in as root by default. Our script needs to live in the data folder, so let’s go there and create pushover.py using nano: cd /data nano pushover.py

cd /data
nano pushover.py

Once here, you’ll need to copy and paste or type in the code listing, while also including your API token and user key where required.

import httplib, urllib

conn = httplib.HTTPSConnection(“api.pushover.net:443”)
conn.request(“POST”, “/1/messages.json”,
urllib.urlencode({
“token”: “APP_TOKEN”, # Insert app token here
“user”: “USER_TOKEN”, # Insert user token here
“html”: “1”, # 1 for HTML, 0 to disable
“title”: “Motion Detected!”, # Title of the message
“message”: “Front Door camera!”, # Content of the message
“url”: “http://IP.ADD.RE.SS”, # Link to be included in message
“url_title”: “View live stream”, # Text for the link
“sound”: “siren”, # Define the sound played
}), { “Content-type”: “application/x-www-form-urlencoded” })
conn.getresponse()

STEP-04 Make your script executable

As with any script, we need to make sure it can be executed, otherwise it’s nothing more than a fancy collection of text! You can do this either from the command line or from within WinSCP. From the command line, make sure you’re in the data folder and then type: chmod +x pushover.py

chmod +x pushover.py

Or, if using WinSCP, select the pushover.py file in the data folder, then press F9. In the window that appears, change the permissions to 0755 and then click ‘OK’ to confirm.

STEP-05 Configure MotionEyeOS to use your script

Now that we have our script, we need to tell MotionEyeOS to use it when it detects motion. To do this, log in, go to the Motion Notifications menu and turn on the ‘Run A Command’ option. You then need to specify which command to run, which will be the Python script you just created – this is /data/pushover.py. Click Apply once done, to confirm the changes.

STEP-06 Test it out!

Hopefully, by now you have created your Python script, made it executable, told MotionEyeOS to use your script when it detects motion, and have the Pushover app installed on your smartphone or tablet. We now need to test that it works! Wave your hand in front of your camera (or you can do a dance if you’re feeling energetic!) and then shortly afterwards you should receive a notification via Pushover, warning you that motion has been detected!

Feel free to experiment with the script to customise the message displayed and sound played in Pushover.

MotionEyeOS on Raspberry Pi – Surveillance Camera System

Do you want to turn your Raspberry Pi into a surveillance camera system? The best way to do it is using MotionEyeOS. In this post we’ll show you how to get started with MotionEyeOS on your Raspberry Pi.

What is MotionEyeOS?

MotionEyeOS is a Linux distribution that turns your single-board computer into a video serveillance system. The MotionEyeOS supports the following devices:

  • Raspberry Pi (all versions);
  • Banana Pi;
  • Odroid C1/C1+, Odroid C2, Odroid XU4;
  • Pine A64/A64+.

MotionEyeOS Features

MotionEyeOS is the perfect solution to build your own surveillance system because it is simple to install and has a web-based, user-friendly interface that is responsive in practically any browser.

It supports most USB cameras, Raspberry Pi camera modules, and IP cameras. Additionally, it brings other useful features when it comes to a surveillance system:

  • Motion detection with email notifications
  • You can set set a working schedule
  • Take still images
  • Store your files in SD card, USB drive, or upload your files to Google Drive or Dropbox
  • Access your media files through FTP server or SFTP server

Parts Required

For this project we’re using the following parts:

  • Raspberry Pi 3 – read Best Raspberry Pi starter kits
  • Camera – Raspberry Pi camera V2 module, USB webcam or IP camera
  • Power Supply 
  • MicroSD Card

Installing MotionEyeOS

To install MotionEyeOs in your Raspberry Pi 3, follow the next steps.

Formatting your microSD card

You’ll install MotionEyeOS on a microSD card and then, insert the microSD card into your Raspberry Pi board. But first, you need to format you microSD card – there are several ways to do this, but we recommend following the next procedure:

  • Go to https://www.sdcard.org/downloads/formatter/ and download the SD Card Formatter software for your operating system.
  • Install the SD Card Formatter software.
  • With your microSD card connected to your computer, open the SD card Formatter application, and format your microSD card with the “overwrite format” option.

Downloading the OS Image

Choose the right image for your device: MotionEyeOS releases page. If you’re using the Raspberry Pi 3, choose motioneyeos-raspberrypi3-xxxxxxxx.img.gz.

Writing the Image

Next, extract the image from the .zip folder. Then, you can use win32diskimager or Etcher, to write the image onto the SD card.

We’re going to use Etcher. If you don’t have Etcher installed, you can click here and install it on your computer.

With the microSD card formatted, and connected to your computer, open Etcher. Select the image you’ve get previously, select your microSD card, and click Flash!

Booting MotionEye on Raspberry Pi

Follow the next steps to boot MotionEyeOS for the first time on your Raspberry Pi.

  • Insert the microSD card in the Raspberry Pi;
  • Connect an Ethernet cable – this is needed on the first boot;
  • Connect a camera. If you’re using the Raspberry Pi camera V2 module, make sure you’ve connected the camera in the right orientation as shown in the following image;
  • Apply power to your Pi, and wait for about 2 minutes for the system to be ready.

Now, to access your Raspberry Pi, you need to find your Pi’s IP Address

Finding Your Raspberry Pi IP Address

To Find your Raspberry Pi IP address, you can use Angry IP Scanner. The IP you’re looking for is the one with “meye” on the name, as shown in the following figure.

Accessing MotionEye For the First Time

Open your browser and type the Raspberry Pi IP address. You’ll see the MotionEye login page.

At the first boot, use the following credentials:

  • Username: admin
  • Password: [No password, leave blank]

If you have a camera connected to your Pi, it should be detected automatically, and you should see a live image from the camera. If you have an IP camera, you need to add it as network camera with the camera stream address with your login credentials for that camera

Foscam C1:

MJPEG – http://[IPADDRESS]:[PORT]/cgi-bin/CGIProxy.fcgi?cmd=snapPicture2&usr=[USERNAME]&pwd=[PASSWORD]

RTSP – http://[IPADDRESS]/videoMain

Initial Setup

You can configure pretty much everything in your web user interface. We recommend taking a look at the following configurations when configuring the MotionEyeOS for the first time.

  • Go to the three bars menu, and open the General Settings;
  • Enable Advanced Settings;
  • You can change the admin username and set a password;
  • You can also set a name for a surveillance user, and its corresponding password;
  • Set your timezone and a hostname.

Click the orange button at the top right “Apply” to apply the changes – this will require a reboot.

Wrapping Up

This was just an introduction on how to get started with MotionEyeOS on the Raspberry Pi 3. In this example we’re using a single device (the Raspberry Pi board) with two cameras, but it can be more useful using a Raspberry Pi 3 as a Hub, and then use several cameras in different locations

If you want to add push notifications in motionEye, then follow the next guide: https://www.tommybaert.be/add-push-notifications-to-motioneyeos/

Automate Docker Image and Container Updates Running on Synology

Updating docker containers is as easy as pulling the image and drop and re-create the container. This can be automated using watchtower appliance, hosted in a docker container itself.

Watchtower is a process for watching your Docker containers and automatically restarting them whenever their base image is refreshed.

Download the docker image

The image is named: centurylink/watchtower

Create container (using terminal)

I’ve set my instance to only match once a day, with a schedule set to every 23h. It will also ensure old image versions are pruned.

Start a terminal session. Log in as a user and then type sudo -i with the admin password to get the root permissions

As root type following code:

root@synology:~# docker run -d –name watchtower -v /var/run/docker.sock:/var/run/docker.sock centurylink/watchtower –interval 82800 –cleanup

Automatically check and upgrade running containers

Watchtower will periodically check the repos for updates and upgrade when neccessary, pruning old image versions when upgrade completes.

This will also update the Watchtower image.

Sickbeard Custom error when starting the package

Problem:

It displayed the following error when starting the package in the package manager.

Failed to run the package service

Solution:

Change the user in the start-stop-status file of sickbeard-custom to “root”.

Steps:

  1. Log into synology through putty (or similar) as “root”.
    1. first log in as admin with the admin password
    2. then type “sudo -i”
    3. use the admin password again
    4. you are now logged in as root
  2. enter “vi /var/packages/sickbeard-custom/scripts/start-stop-status
  3. Navigate (using arrow keys on keyboard) to line that says “USER=”sickbeard-custom” (about 4 lines down)
  4. Using the Basic commands for the Linux vi Editor http://forum.synology.com/wiki/index.php/Linux_VI_Editor
    • delete (x) the word “sickbeard” and replace/insert (i) it with the word “root”
    • Press ESC to exit insert mode
    • Press SHIFT :wq then enter to save and exit.
  5. Type “vi /var/packages/sickbeard-custom/scripts/start-stop-status” to confirm that the USER has been correctly changed to root.
  6. Close and exit Putty if you desire.
  7. Open sickbeard web management page [http://<Diskstation IP>:8083]

Automatically connect a Raspberry Pi to a Wifi network with a Belkin N300 micro USB dongle

Setting up WiFi connection

Start by booting the Raspberry Pi, connected to a display and a keyboard. Open up the terminal and edit the network interfaces file:

$ sudo nano /etc/network/interfaces

This file contains all known network interfaces, it’ll probably have a line or two in there already.

Change the first line (or add it if it’s not there) to:

auto wlan0

Then at the bottom of the file, add these lines telling the Raspberry Pi to allow wlan as a network connection method and use the /etc/wpa_supplicant/wpa_supplicant.conf as your configuration file.

allow-hotplug wlan0
iface wlan0 inet dhcp
wpa-conf /etc/wpa_supplicant/wpa_supplicant.conf
iface default inet dhcp

(ctrl-X, then type Y to quit and save)

The next step is to create this configuration file.

Configuring WiFi connection

Open up the wpa_supplicant.conf file in the editor.

$ sudo nano /etc/wpa_supplicant/wpa_supplicant.conf

Again, some lines might already be present, just add the following.

network={
ssid="YOUR_NETWORK_NAME"
psk="YOUR_NETWORK_PASSWORD"
proto=RSN
key_mgmt=WPA-PSK
pairwise=CCMP
auth_alg=OPEN
}

Make sure it works

Reboot the Raspberry Pi and it should connect to the wireless network.

sudo reboot

A static IP

Since the goal of this tutorial is to be able to work with the RPi without external keyboard or display, you want to be ssh into it. The best way is to make sure it’ll always have a static IP on your network.

Doing so is simple. Open the /etc/network/interfaces file again and add the following changes:

Change iface wlan0 inet dhcp into iface wlan0 inet static. This changes the wlan0 interface from DHCP to static.

Add the following lines before the wpa-conf line:

address 192.168.1.155 # Static IP you want 
netmask 255.255.255.0 
gateway 192.168.1.1   # IP of your router

Reboot your Raspberri Pi

sudo reboot


Connection MrMC (ATV4) with MySQL database

First export your local database

  • Export your library as a single file to a network location

Setup MySQL Database

  • First SSH into your Synology
ssh root@ipsynology
  • Connect to the database.
mysql -u root -p

Specify MySQL user with -u option. If the user has a password add the -p option. Enter the password used during MySQL configuration when prompted.

  • Create a new database user.
CREATE USER 'mrmc' IDENTIFIED BY '*****';

Username is defined with CREATE USER statement while the password is specified with IDENTIFIED BY statement.

  • Grant permissions on video and music databases to the new user.
GRANT ALL ON `MyVideos%`.* TO 'mrmc';
GRANT ALL ON `MyMusic%`.* TO 'mrmc';

All possible permissions are granted with GRANT ALL ON statement to both Kodi video and music databases. User that is being granted permissions is specified with the TOstatement.

  • Exit the database command line tool.
quit
  • Enable the MySQL and your library will be empty
  • Import your previously exported database in the MySQL database
  • Now connect your other MrMc installations with the MySQL database and everything will be synced

Mount network drives in ClearOS

Create a SSH connection to your ClearOS server with putty or via terminal

1. Create a folder to mount share on

mkdir /mnt/folder

2. Open FSTAB

nano /etc/fstab

3. Add share definition/s to FSTAB, add the following line to the end. Once happy save (CTRL-O)

\\compname\sharenam     /mnt/folder  cifs auto,rw,username=usernamel,password=password 0 0

4.Mount Shares

mount -a

And your done….

Last update Kodi for the Apple TV 2

kodi-helix-14.1

Kodi v14.1 “Helix” is the last update that you can install on the Apple  TV 2

To update follow these steps:

  1. Open up your terminal/ssh application and enter the following command to log in to your ATV2:
    ssh root@YOUR.ATV2.IP.ADDRESS
    EXAMPLE: ssh root@192.168.1.5
  2. You will be asked for a password: default password is alpine
  3. Continue to enter the following commands:
    apt-get update
    apt-get install org.xbmc.kodi-atv2