Integrate Solis S6 inverter in Home Assistant

First set up your Solis PV installation in the SolisCloud app.

  1. Create your installation
  2. Connect your Datalogger to your WiFi network
    • Select your installation, then go to Device S/N tab – Datalogger
    • Click the + icon on the bottom
    • Scan the QR code from on the Datalogger
    • Follow the steps given by the wizard
    • Your Datalogger is connected to your WiFi network
  3. Add your inverter to your installation
    • Select your installation, then go to Device S/N tab – Inverter
    • Click the + icon on the bottom
    • Scan the QR code from on the Inverter
      • If yhis doesn’t work, you can manually enter the S/N in the wizard
    • Follow the steps given by the guide
    • Your inverter is added to your PV installation

Now you have to wait a while until your installation comes online and you see the values produced by the solar panels.

Next up is to integrate it in Home Assistant

First install HACS in Home Assistant and search for the Solis integration.
Install the Solis integration

Then go to your Home Assistant settings/devices-services view
add a new service and look for the Solis service. Once found, install it.

Open the Solis service, name your inverter and select the Solis cloud option. When done, follow the guide from the developer on his github page to obtain the needed secret, StationId and API key from Solis.
Select the

Once you have completed all these steps, you should see all entities of the Solis inverter in your Home Assistant and notice they are getting feeded by values.

Now open the energy page and click on the 3 dots in right hand top corner and select energy configuration.
There you can add the solis_s6_energy_today sensor in your solar production tab.

That is all you have to do to get the solar production in your Home assistant.

Tuya ZigBee Energiemeter 80A

Deze week een energiemeter van AliExpress ontvangen. Het model is _TZE204_cjbofhxw (TS0601).
Deze gekoppeld in mijn ZHA, maar er was geen enkele entiteit beschikbaar. Dus op zoek op het www en natuurlijk had iemand al een oplossing gevonden in de vorm van een custom quirk.

Om een custom quirk te kunnen laden, moet eerst de configuration.yaml aangepast worden dat deze ook geladen kunnen worden. Voeg de volgende code toe in je configuration.yaml.

#ZHA custom quirks
zha:
  enable_quirks: true
  custom_quirks_path: /config/zha_quirks

Natuurlijk moet de map zha_quirks nog aangemaakt worden in je config folder in Home Assistant.

Daarna pak volgend bestand uit en upload naar de zha_quirks map

Herstart Home Assistant en ga dan naar je ZHA integratie. Koppel de energiemeter, geef hem een naam en plaats hem in een kamer.

Nu zou je in de eigenschappen van de energiemeter het gebruik van de quirk moeten zien

Herstart Home Assistant opnieuw en alles zou nu moeten werken. Dit kan je zien door de power led van de vermogensmeter die nu knippert en niet meer continue brandt. De vermogensweergave wordt pas zichtbaar nadat je de klem gebruikt hebt.

Indien er een entiteit of sensor niet zichtbaar zijn, herstart Home Assistant dan eens.

Synology Surveillance Station Home Mode Automation with Home Assistant

I have found a guide on the www, but it was not that 100% clear and I had to google a lot of things to be clear. But I got it 100% functional and will publish an updated guide here.

This is the url for the original guide: https://www.paolotagliaferri.com/home-automation-home-assistant-docker-synology/

Some prerequisites:

  • Docker
  • Home Assistant
  • Surveillance Station
  • Unifi network or similar that can be integrated in Home assistant

First:

Find the entity identifier of your mobile phone that is used by the Ubiquiti UniFi integration

Create a group where the entity that represents you in your configuration.yaml

Next:

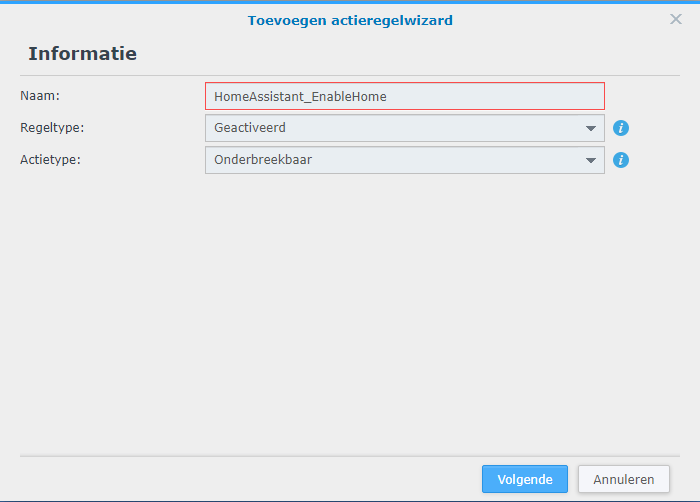
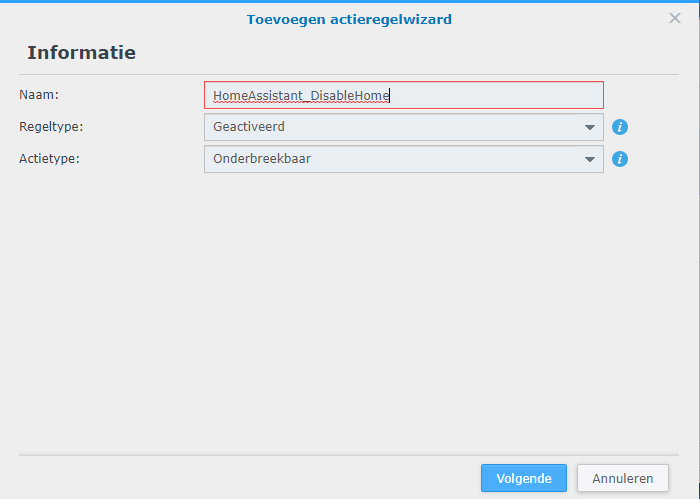
Then on the Synology Surveillance Station, I generated two actions in the Action Rule section to create webhooks that Home Assistant can use for switching the Home mode on or off

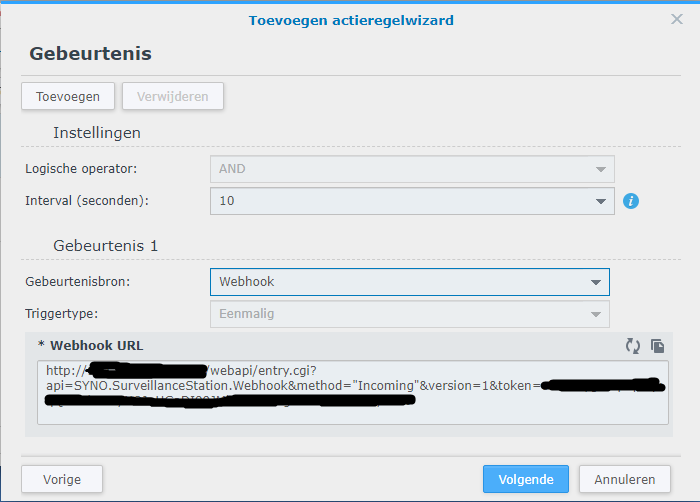
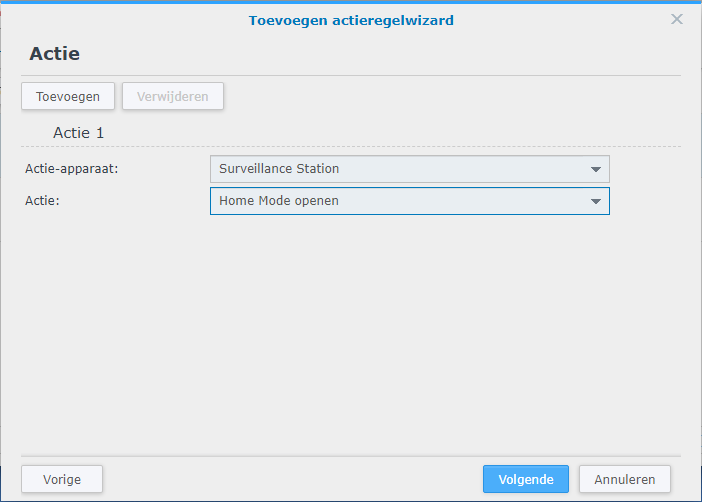
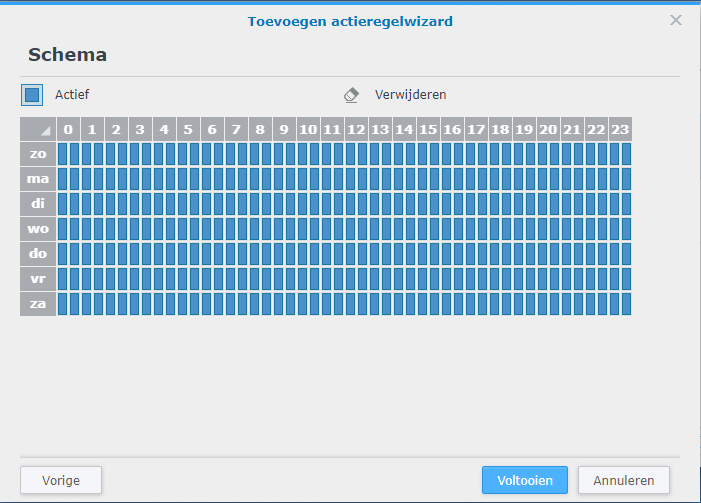
First I will create the rule to enable home mode

Here you see the webhook url we will use in the secrets.yaml later on

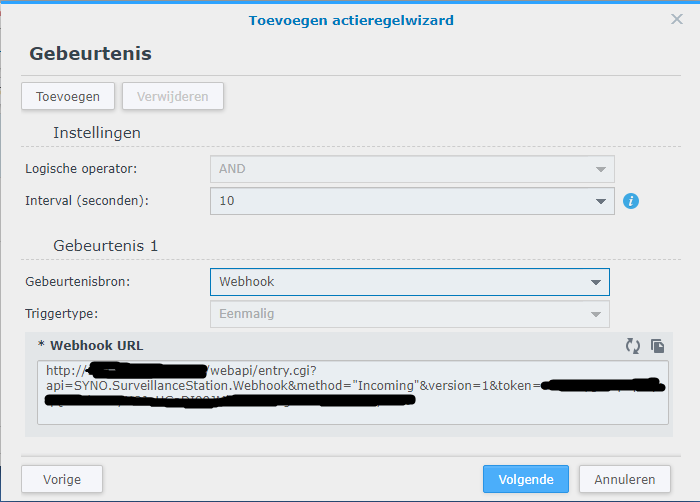
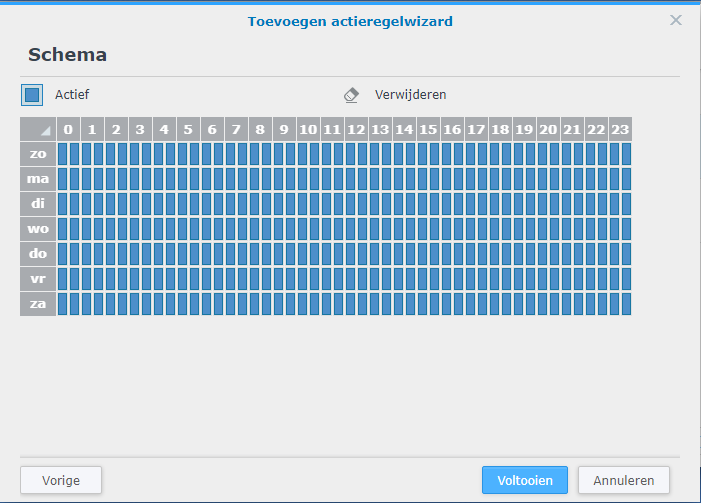
Now you have create the rule to enable the Home mode in surveillance station. Next will be the disable Home mode rule

Here you see the webhook url we will use in the secrets.yaml later on

When you have followed all steps, this will be the result

Now we are going to define 2 variables for the webhooks in the secrets.yaml file. These variables will be used in the configuration.yaml later.

When that is done, we can go back to the configurations.yaml to define the webhooks so they can be used for automation

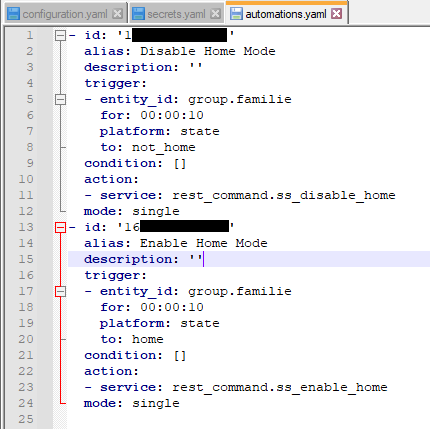
Finally – I defined the automation in the UI (or in the configurations.yaml file) – here’s the generated configuration

Last thing to do is to check the configuration for errors and if that passes, you can restart the Home Assistant server.

Now the moment you go out of range of your wifi, Synology Surveillance station will go out of home mode and vica versa. Keep in mind that the standard delay the Ubiquiti UniFi integration uses for switching from home to not home is 300 seconds.