Do you want to turn your Raspberry Pi into a surveillance camera system? The best way to do it is using MotionEyeOS. In this post we’ll show you how to get started with MotionEyeOS on your Raspberry Pi.
What is MotionEyeOS?
MotionEyeOS is a Linux distribution that turns your single-board computer into a video serveillance system. The MotionEyeOS supports the following devices:
- Raspberry Pi (all versions);
- Banana Pi;
- Odroid C1/C1+, Odroid C2, Odroid XU4;
- Pine A64/A64+.
MotionEyeOS Features
MotionEyeOS is the perfect solution to build your own surveillance system because it is simple to install and has a web-based, user-friendly interface that is responsive in practically any browser.
It supports most USB cameras, Raspberry Pi camera modules, and IP cameras. Additionally, it brings other useful features when it comes to a surveillance system:
- Motion detection with email notifications
- You can set set a working schedule
- Take still images
- Store your files in SD card, USB drive, or upload your files to Google Drive or Dropbox
- Access your media files through FTP server or SFTP server
Parts Required
For this project we’re using the following parts:
- Raspberry Pi 3 – read Best Raspberry Pi starter kits
- Camera – Raspberry Pi camera V2 module, USB webcam or IP camera
- Power Supply
- MicroSD Card
Installing MotionEyeOS
To install MotionEyeOs in your Raspberry Pi 3, follow the next steps.
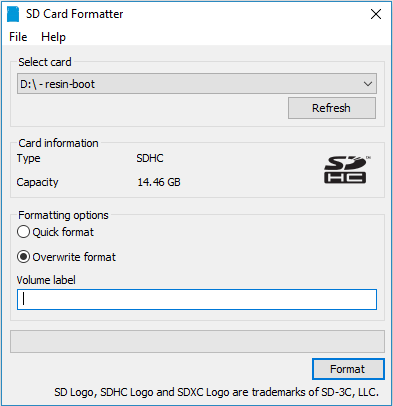
Formatting your microSD card
You’ll install MotionEyeOS on a microSD card and then, insert the microSD card into your Raspberry Pi board. But first, you need to format you microSD card – there are several ways to do this, but we recommend following the next procedure:
- Go to https://www.sdcard.org/downloads/formatter/ and download the SD Card Formatter software for your operating system.
- Install the SD Card Formatter software.
- With your microSD card connected to your computer, open the SD card Formatter application, and format your microSD card with the “overwrite format” option.
Downloading the OS Image
Choose the right image for your device: MotionEyeOS releases page. If you’re using the Raspberry Pi 3, choose motioneyeos-raspberrypi3-xxxxxxxx.img.gz.
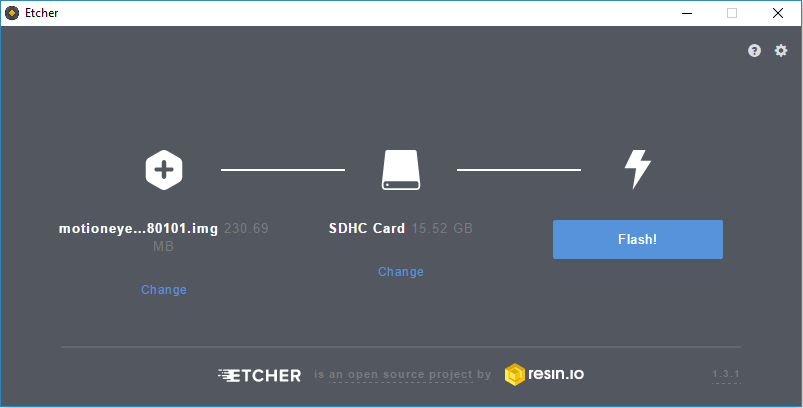
Writing the Image
Next, extract the image from the .zip folder. Then, you can use win32diskimager or Etcher, to write the image onto the SD card.
We’re going to use Etcher. If you don’t have Etcher installed, you can click here and install it on your computer.
With the microSD card formatted, and connected to your computer, open Etcher. Select the image you’ve get previously, select your microSD card, and click Flash!
Booting MotionEye on Raspberry Pi
Follow the next steps to boot MotionEyeOS for the first time on your Raspberry Pi.
- Insert the microSD card in the Raspberry Pi;
- Connect an Ethernet cable – this is needed on the first boot;
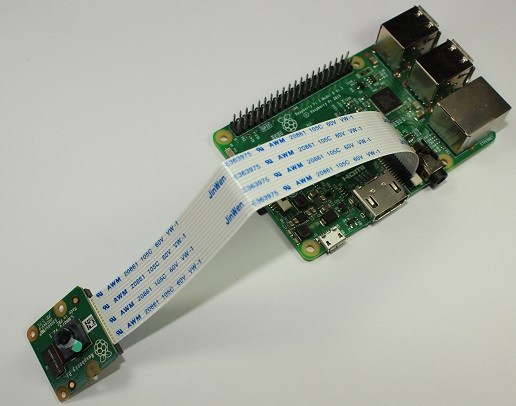
- Connect a camera. If you’re using the Raspberry Pi camera V2 module, make sure you’ve connected the camera in the right orientation as shown in the following image;
- Apply power to your Pi, and wait for about 2 minutes for the system to be ready.
Now, to access your Raspberry Pi, you need to find your Pi’s IP Address
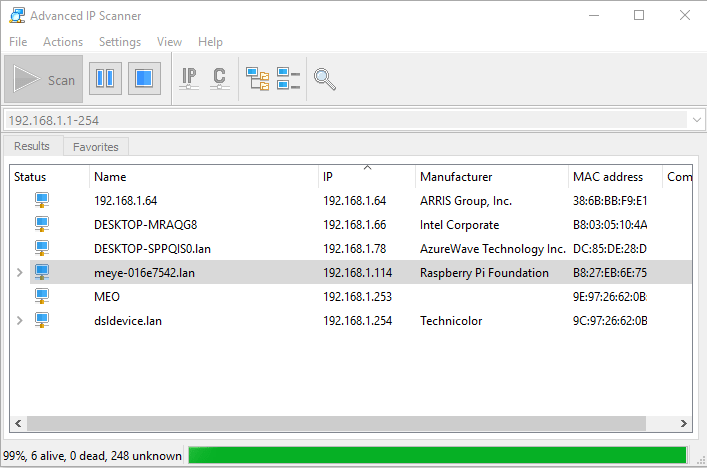
Finding Your Raspberry Pi IP Address
To Find your Raspberry Pi IP address, you can use Angry IP Scanner. The IP you’re looking for is the one with “meye” on the name, as shown in the following figure.
Accessing MotionEye For the First Time
Open your browser and type the Raspberry Pi IP address. You’ll see the MotionEye login page.
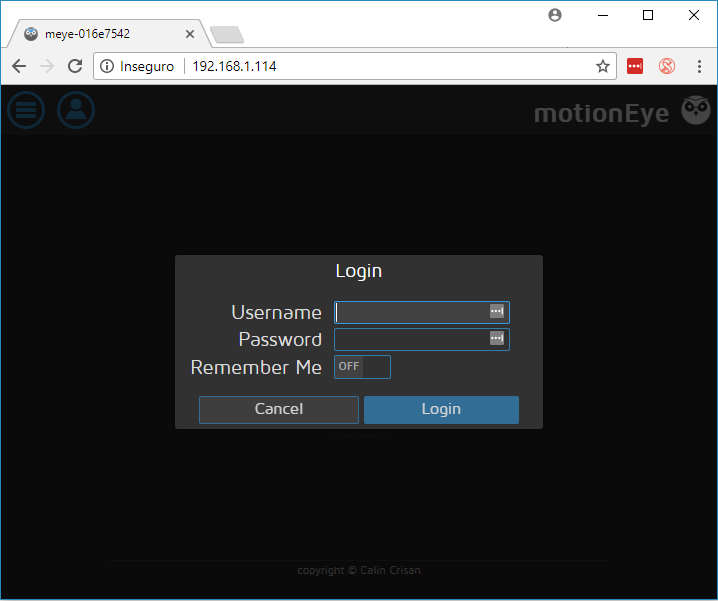
At the first boot, use the following credentials:
- Username: admin
- Password: [No password, leave blank]
If you have a camera connected to your Pi, it should be detected automatically, and you should see a live image from the camera. If you have an IP camera, you need to add it as network camera with the camera stream address with your login credentials for that camera
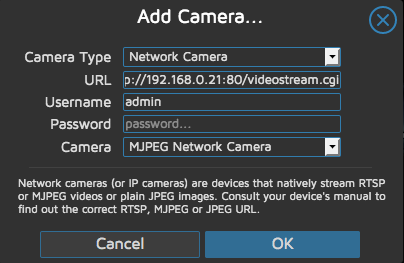
Foscam C1:
MJPEG – http://[IPADDRESS]:[PORT]/cgi-bin/CGIProxy.fcgi?cmd=snapPicture2&usr=[USERNAME]&pwd=[PASSWORD]
RTSP – http://[IPADDRESS]/videoMain
Initial Setup
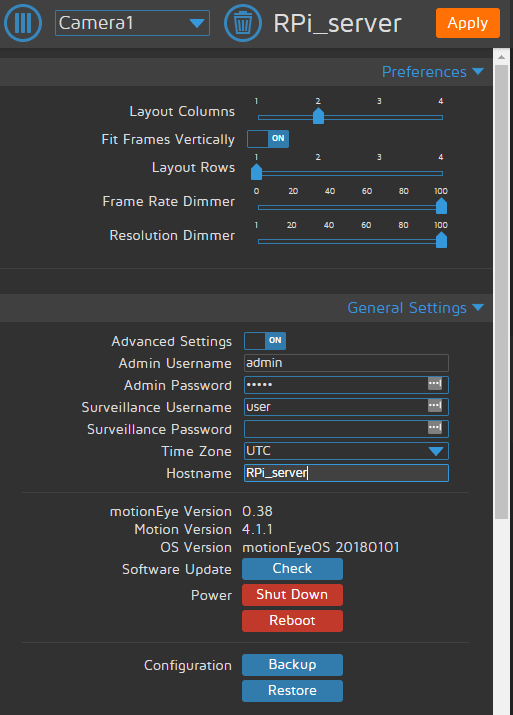
You can configure pretty much everything in your web user interface. We recommend taking a look at the following configurations when configuring the MotionEyeOS for the first time.
- Go to the three bars menu, and open the General Settings;
- Enable Advanced Settings;
- You can change the admin username and set a password;
- You can also set a name for a surveillance user, and its corresponding password;
- Set your timezone and a hostname.
Click the orange button at the top right “Apply” to apply the changes – this will require a reboot.
Wrapping Up
This was just an introduction on how to get started with MotionEyeOS on the Raspberry Pi 3. In this example we’re using a single device (the Raspberry Pi board) with two cameras, but it can be more useful using a Raspberry Pi 3 as a Hub, and then use several cameras in different locations
If you want to add push notifications in motionEye, then follow the next guide: https://www.tommybaert.be/add-push-notifications-to-motioneyeos/